Thursday, January 9, 2014

Corned Beef Caldereta

I have been experimenting lately with canned goods. As you may have read last time, I have experimented with corned pork. This time, I was staring at the pantry and thought, why not "play" with corned beef this time?

So yea, there I was, slaving away in the kitchen for our experiment of a dinner. Hehe! I was pretty surprised that the kids--even my two-year-old loved it!

And yes, I'm sharing the recipe to you all. :)

Ingredients:

2 tbsp olive oil (or just the usual cooking oil, your choice)
4 cloves garlic, crushed
1 medium-sized onion, minced
2 tomatoes, diced
1 bell-pepper, diced
1 can 210g corned beef (preferably Highlands or Purefoods)
half can liver spread
1/4 cup water
1 small can of green peas, drained
1 large carrots, chopped
2 medium-sized potatoes, quartered
1/4 cup tbsp soy sauce
1 tbsp sesame oil
115g tomato paste
1/8 cup grated cheese
1 tsp cumin
2-3 pcs bay leaves
sugar, salt and pepper to taste

Dinner is served! :)


Instructions:

1. Sauté onion, garlic, tomatoes and bell pepper with cooking oil on a medium to high heat casserole.
2. Add in the corned beef.
3. Season with soy sauce and add the liver spread. Put in the bay leaves for aroma.
4. Pour in tomato sauce, peas, carrots and water. Stir and let it simmer.
5. Once the carrots are slightly tender, add in the potatoes.
6. Mix sesame oil, cumin, sugar, salt, pepper and cheese. The measurements of the spices are approximate. You could always adjust to your taste.
7. Once all veggies are done, remove from heat and transfer to serving dish. You don't want your veggies to turn soggy, yea?
8. Bon appetit!


There you have it. Enjoy! :)

Friday, December 27, 2013

Corned Pork... Adobo???

Helloooooo domestic rockstars!!!

How was your holiday celebration? Mine was a bit tiring, but nevertheless, amazing. Great people--family and friends, nice presents and awesome food... I just couldn't ask for more!

Anyway, speaking of food, I discovered something today out of boredom--CORNED PORK ADOBO!

I know it sounds a bit weird, but trust me, it's good! I was getting too tired of the usual corned beef/corned pork cooked with potatoes. Heck, I sometimes even use that for a quick spaghetti! So yea, I thought of mixing things up a bit. I was thinking of making a corned pork sinigang as I remembered having corned beef sinigang at Sentro. But then I thought, why not try something else? Then I remembered adobo flakes and so I thought, "why the hell not?!"

There it was, a gastronomic epiphany.

I followed my guts and quickly grabbed a head of garlic, some vinegar, salt and pepper.

I mixed the corned pork with the adobo ingredients and let it simmer, boil, until the adobo finally dries out like the adobo flakes at the local resto. Aaaahhh... Warm rice, sliced tomatoes and that. Awesome. Just. Plain. Awesome.

Anyway, since I was very happy with the result, I decided I'll share it with you guys so you might try them too!

Hello there, dinner! :)
All you need are the following:

1 can corned pork
1 teaspoon salt
5 cloves of garlic, crushed
1/3 cup of white vinegar

Procedure:

In a pan, mix the corned pork, salt, vinegar and garlic altogether. Place under low heat, mixing occasionally, until the adobo dries up and become flakes. Add more salt and vinegar if necessary.

Serve with warm rice and/or sliced tomatoes.

Adobo with rice and tomatoes... Yum!
The best part: my 4yo and 1yo daughters were sooo happy with the adobo that they had seconds! Even I did. We all know adobo without extra rice is cruelty to mankind, yea? Haha!

Anyway, I hope you all would try this soon. I promise you'll love it! :)

Tuesday, December 24, 2013

My Banana Caramel Cream Cheese Pie for Christmas

Happy holidays y'all! :)

It's our last holiday season here in the country before we leave and well, in this home, I'd rather go big or go home... or should I say, go home and get fat! Haha!

Santa would have loved this... If only he was real. Lol
I have been slaving for hours in the kitchen today making my Christmas cookies and pie for our noche buena. I made extras so I can bring pasalubong for tomorrow's get together with the whole fam. It's our last holiday season here in the Philippines before we leave for Canada next year. Might as well leave them happy and full, yea?

They say the ham is a Pinoy's "star" at their noche buena,
but not to my kids. This is theirs. Haha!
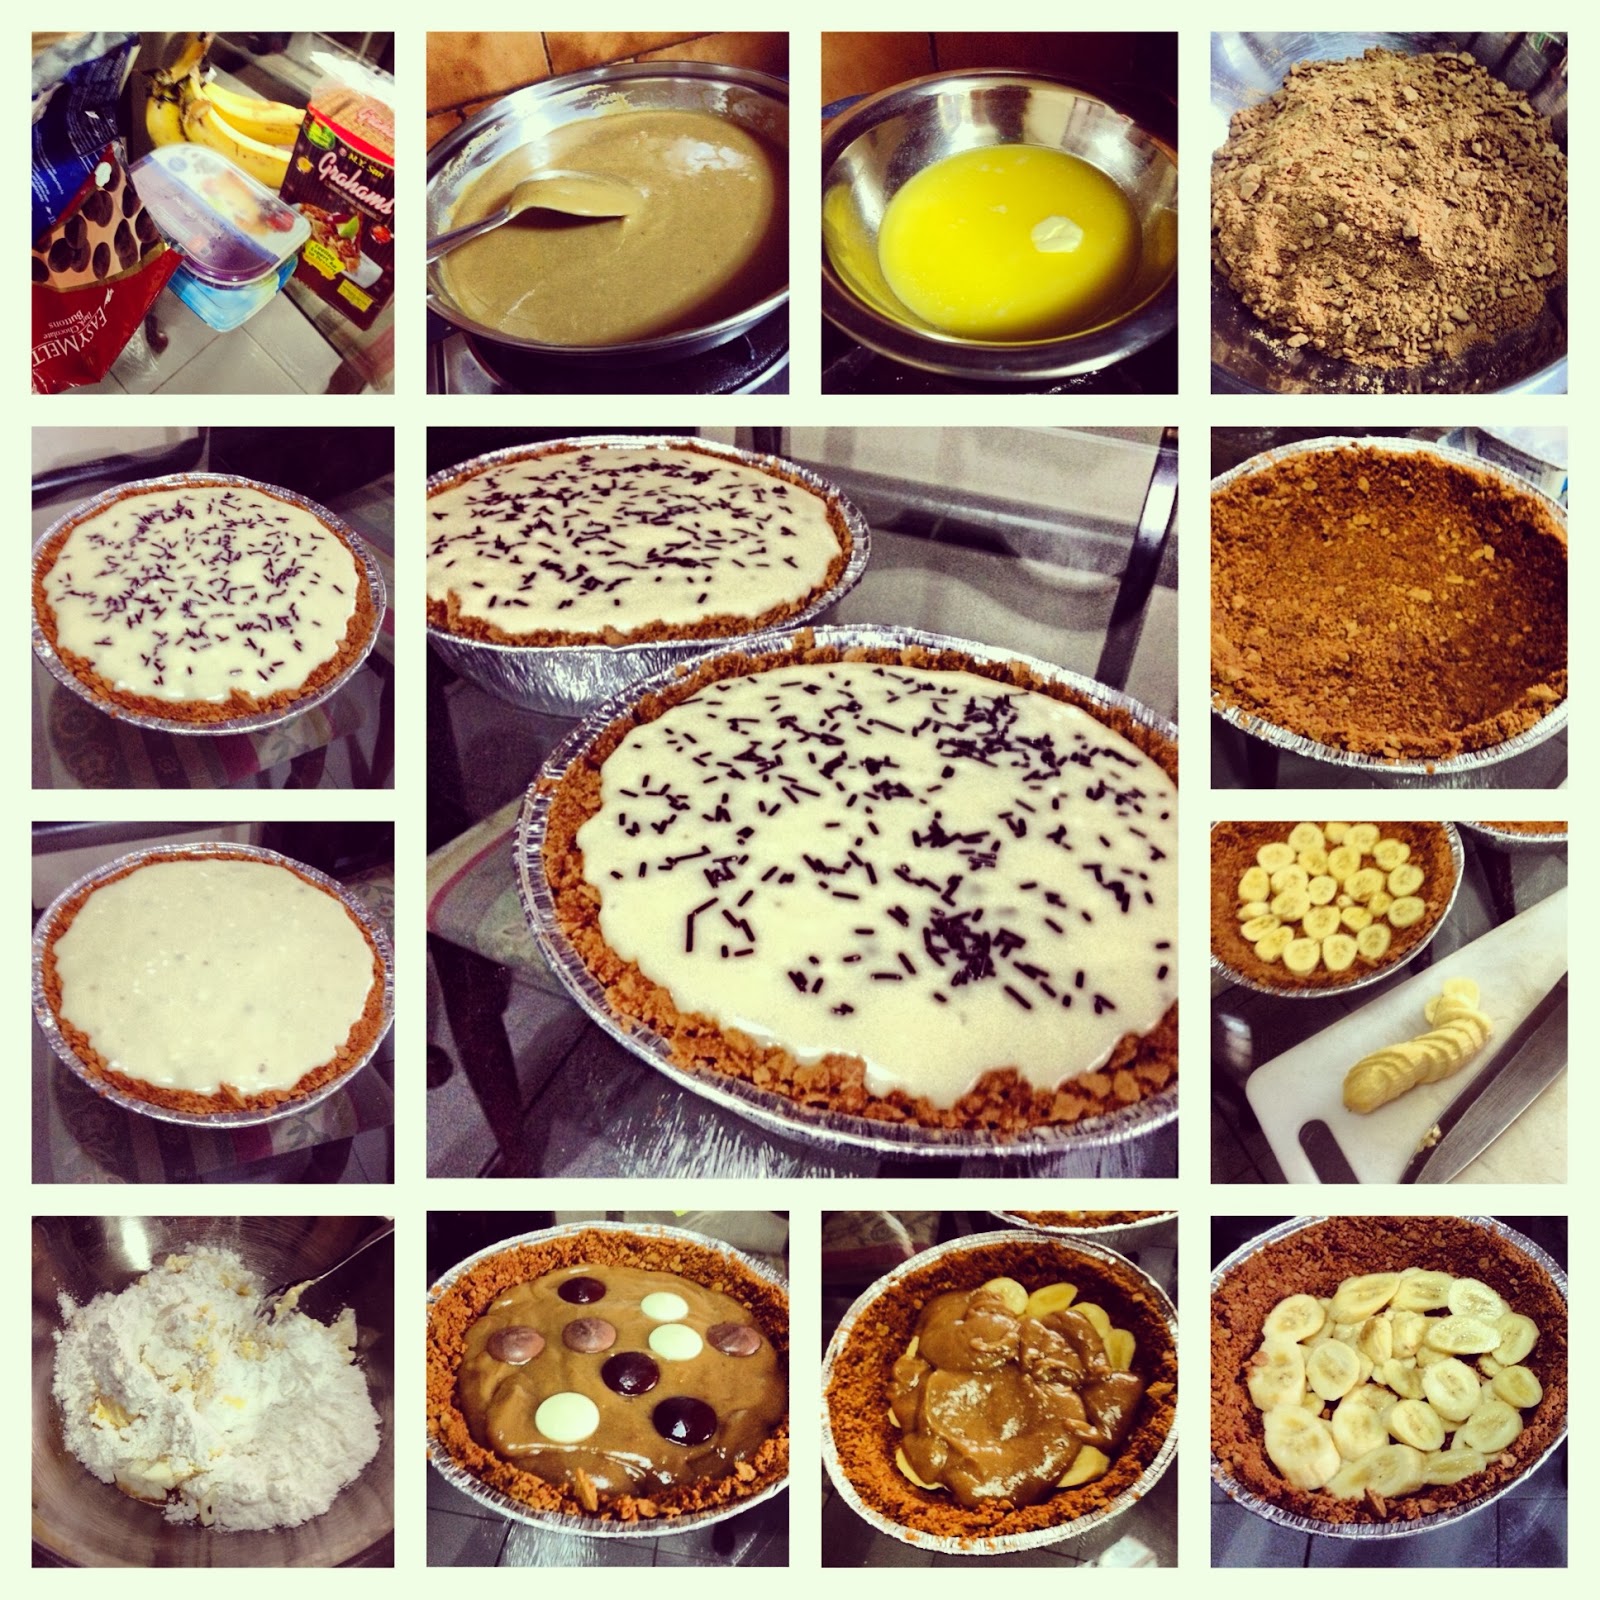
Aside from the usual Pinoy tradition of fiesta ham dinner, I thought of making our own dessert this time. A couple of days back, I dreamt of making pie and thought I'd make a banoffee pie. This morning, though, I thought of cream cheese as well. So I figured, I'll make a banana caramel cream cheese pie instead. It's like banoffee pie with cream cheese frosting, instead of whipped cream.

As my Christmas gift to you guys, I am sharing you the recipe. :)

Ingredients:

Pie crust:

250g graham crackers, crushed
100g butter, melted

Caramel sauce:

1 can condensed milk
150g brown sugar
150g butter
1/4 tsp salt

Cream cheese frosting recipe here.

Toppings and filling:
5 large bananas
Chocolate chips/buttons
Chocolate sprinkles (optional, topping)
Crushed nuts (optional, topping)
Chocolate and/or caramel drizzle (topping)


Procedure:

Caramel sauce:
1. Under low heat, melt butter and sugar in sauce pan.
2. Pour condensed milk and bring to a rapid boil, stirring constantly for about a minute or two.
3. Set aside until it has completely cooled down.

While the caramel sauce cools, you might as well prepare the crust.

I prefer mine with some chunks. Gives it a bit of crunch. :)
Pie crust:
1. Mix crushed grahams with melted butter.
2. Pour in a round pan.
3. Using a spoon, create the base of the pie crust first, then onto the sides to make the pie shell.

Prepare the cream cheese frosting afterwards.


Assembly:

1. After creating the pie crust/shell, place sliced bananas on the bottom layer of the pie.
2. Pour caramel over the bananas until about 2/3 of the pie. Make sure it has completely cooled down to avoid having a runny cream cheese frosting as well as to avoid melting the chocolate chips/buttons.
3. Place chocolate chips/buttons over caramel.
4. Pour cream cheese frosting on top, covering the rest of the pie.
5. Top with sprinkles, nuts*, bananas*, chocolate/caramel drizzle*. I made mine with just the sprinkles just to make people believe that I really made it. Haha!
6. Chill for about an hour before serving. Enjoy! :)

A step-by-step guide in photos.
Merry Christmas!!! :D

Wednesday, December 11, 2013

Chewy Toaster-baked Chocolate Chip Oatmeal Cookies

When people hear oatmeal cookies, the first thing that usually comes in their minds are those hard-as-rock cookies. But fear not, my lovely domestic rockstars! I have come to save the day. :) I'll be sharing with you my recipe of cookies. If you make this right, you'll have a perfect batch of cookies that are slightly crispy on the edges, but chewy in the middle.

Just this morning, I made my kids some oatmeal cookies. My eldest, Renee ate about a third of the first batch without even waiting for it to cool down fully! I made a total of 32 cookies altogether--first and second batch. Renee devoured (yes, that word!) 5 cookies in one go, while Allie had 2, and the rest was eaten by the grown-ups. Renee asked me if I could make more. She'd like to have some more cookies for desert after lunch.

Sometimes I wonder where she puts all those food in her tummy... The kid never goes fat! Ah well, probably all those food would melt away quickly, considering how crazy energetic she is all day. Haha!
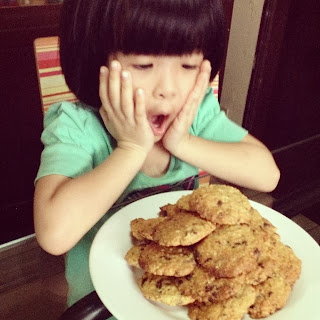
Her second batch. She wanted me to take a "shocked" photo
of her because she wants to be a cookie model. Haha!

Anyway, here's my cookie recipe.

What you'll need:

Tools:

Toaster oven
Aluminum foil
Baking tray (most toaster ovens come with these)
Small spoon/scoop
Mixing bowl

Ingredients:

1/2 cup (or 1 stick) of butter, cut into small cubes; softened
1 large egg
2/3 cups light brown sugar, packed
1 tsp vanilla extract
1 cup all-purpose flour
1 cup instant oats (or crushed Frosties cereal)
1/2 tsp baking soda
1/2 tsp salt
1/4 cup dark chocolate chips
1/4 cup milk chocolate
1/2 cup pistachios or walnuts (optional)
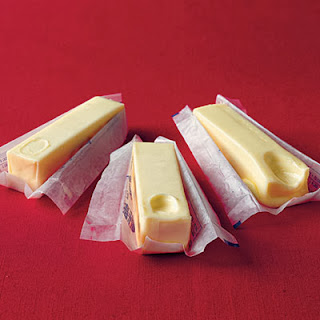
One of the most common mistakes most people do is over-softening the butter.
To check if your butter is just right, gently press on the butter using your index finger.
It should look like the one at the center. If your butter turns out like the one in the right,
then that means your butter may cause you a runny batch of cookies.
(Photo source: cookinglight.com)
Procedure:

1. In a large bowl, mix together the flour, sugar, salt and baking soda. Once those are already incorporated, add in the oats or cereal.
2. Add in the butter. Make sure you don't melt the butter--or over-soften them--before adding it to your dry ingredients. This will make your cookie dough look more like a batter instead, making your cookies runny. Using your hands, mash the butter with the dry ingredients until it forms a grainy bowl of mixture.
3. In a separate bowl, whisk the egg and vanilla.
4. Combine the egg and vanilla mixture to the dough.
5. Add in the chocolate (and nuts, if you want to add them too) to the mixture. I used my kids' favorite chocolates instead of chips and chopped them into small chunks. I wanted to use half dark and half milk chocolates so they won't be too bitter nor too sweet.
6. Line the baking tray with aluminum foil, shiny side down.
7. Scoop a ball of dough and flatten them on the lined baking tray.
8. Bake them for 4 minutes in the toaster, turn them over and bake for another 3-4 more minutes or until golden brown (Sometimes, you have to adjust your baking time with the altitude as well, especially if you live in the mountains. No, I'm not kidding). Bear in mind that you are using instant oats and that they are easily burnt if left longer in the oven.
9. Set the cookies aside to rest and cool down.
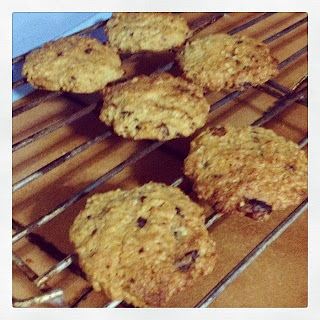
What was left of our first batch after Renee ate about 4 of them (that time I took this photo.
She ate more after), Allie had 1 at that moment, and the other 4 by the grown-ups. 

So there you have it. I hope you guys would enjoy making and eating them as much as we do. Happy baking! :)

Saturday, December 7, 2013

A List of Lists... Goals, To-Do's, To-Buy's for the Year's End

Now that 2013 is almost over, not only am I writing down my "naughty and nice list" aka people we should be giving presents, but I am also writing down a list of our to-do's before we migrate, our moving itinerary for 2014 once we land in Canada, and a list of my to-do's (and to-cook) for the holidays. Bit by bit, I am already collecting ingredients for my Christmas menu--herbs, spices, cookie and pie ingredients, etc.

Aside from that, I am also writing down my list of goals for the coming year. I personally do not believe in resolutions. I mean, people always write things like...


New Year's Resolution:
1. Be nice
2. Be more compassionate
3. Abs
4. Abs
5. Abs
6. Stop hoarding
7. No more shopping sprees


Trust me, you can only go with number one and two. I'm pretty sure you won't last a year sticking on to the rest of that list!

Anywayyy... I made my own list of goals. Not resolutions. I want attainable things. You know, just simple ones that you can assure yourself you can always do--pursue drawing, get my eldest through her first year of school, learn to drive, learn to cook more recipes--stuff like that. Oh yea, and I also wanna make my own bacon, turducken, etc. I love food, don't judge me. Haha!


Nothing's wrong with the resolutions, mind you. But then again, if you come to think of it, those things that you would write EVERY SINGLE YEAR is not going to work if you'd just write it down. You wanna be nice, be nice. You wanna go on a diet, then go. Don't just do it this week, then stop the next just because "you were PMS'ing" or something. If you want something, set it as a goal. Eye on the prize!

What I'm trying to say is, resolutions are firm decisions. That said, you shouldn't be writing about something you are "firm" to do so, if you're not really into it. You'd rather aspire, and then step by step, you reach that particular goal you once wrote on your old list of resolutions.

Well, that's just me. Lemme know what you think. What are your 2014 plans?

Wednesday, November 27, 2013

How to Remove Stains on Concrete and Wood

Every parent's nightmare starts with that very moment their toddler picks up a marker, a crayon, or a pencil, and starts scribbling all over the walls, furniture, TV--just everywhere! Worse part of it all, you can't take it off even if you scrub it with a brush and your trusty detergent. Or that you have removed the stain ALONG with the paint/varnish on your walls or furniture (GASP)!

Here's something I have learned 4 years and 2 daughter later, and I am sharing it to you all for the sake of your sanity. Best part of it all is that you don't have to drive too far to look for the materials--just in the bathroom or the garage. Yay!


How to remove stains on wooden surface:

What you'll need:

Damp cloth or baby wipes
White toothpaste; NOT gel toothpaste

Procedure:

Squeeze about a pea-sized amount of toothpaste on a damp cloth or baby wipes. Wipe wipe wipe! Et voila! Stain's gone.
The kids' door... After some toothpaste and baby wipes action,
Allie's "abstract" art using a pencil, a marker and black crayon are finally gone.

How to remove stains on concrete surface:

What you'll need:

Damp cloth or baby wipes
WD-40
Optional: face mask or anything to cover your nose (especially if you have asthma or allergies)

Procedure:

Spray a bit of WD-40 on the stain. Be careful not to spray it on toys, etc. or you have to clean it all up! Wipe away the stain and the remnants of the WD-40. Ta-da! It's as if nothing ever happened.

The room's wall...
About a spot of WD-40 and a good wipe on Allie's crayon graffiti,
it's as if the walls have been untouched!

So there you go. No more stains, no re-painting needed, and most of all, no expensive stain removers required. Happy mommy and daddy!

Good luck! :)

Friday, November 15, 2013

A Sigh of Relief

A few of days back, my family and I were frantic with worry due to the situation in the Visayas. Reason being, my Aunt, cousins, niece and nephew all live in Tacloban. All lines of power and communication went out as Haiyan (Typhoon Yolanda) ravaged the region, leaving a massive trail of devastation. Lives and homes were lost by this tragic catastrophe.
Photo credit: NBCNews.com

Yesterday, as most people in the area laid their deceased loved ones to rest in a mass grave in Tacloban, my family finally got a message from my cousin that they are safe. My mother, and the rest of her siblings, got a huge sigh of relief to have found out that my aunt and her family are okay.

If you may have noticed in my last post, I posted an SOS to you all in case someone might have seen them in Tacloban during the rescue efforts. I am happy to say that they are fine now. Although they have lost their things, they are all alive and safe now. Their house was a mess, but still liveable. Only problem is, there are no lines yet for power and communication, no water, no food, and no meds. They have been travelling back and forth to Samar to get food rations from the relief operations so they could survive for the moment.

Haiyan victims rescued by C-130 planes have finally landed
in Villamor Airbase, Manila
(Source: http://www.dailymail.co.uk/)

In this post, I also want to thank those who helped me and my family through links of lists, videos, etc. so I can identify if anyone in those videos were my relatives. Also, the nations who have sent help... THANK YOU. To the government institutions who aided the people--except for the politicos with other agenda than to help--the Armed Forces, police force, DOH, etc. I may be harsh in my words with some of those who sugarcoated the news about those people, hiding the real condition of the people to "avoid panic" for the victims' relatives, I still thank you for helping out those in need.

You can find relief facilities almost anywhere at the moment.
Please send your donations to Red Cross, nearby hospitals, schools,
fastfood establishments, banks, etc. to help out our
kababayans in the Visayas. :)

What I am asking you all right now is to please help the people in need. In cash, in kind or if you can volunteer. Doesn't matter how, but just please, help them in any way. We may have lost some of our stuff by giving them away, but it's the least we can do for those who have lost way more than just material things.

Happy Friday everyone. Our nation will get through this. Kapit lang.